September 16, 2010
Project 3 Concert Poster
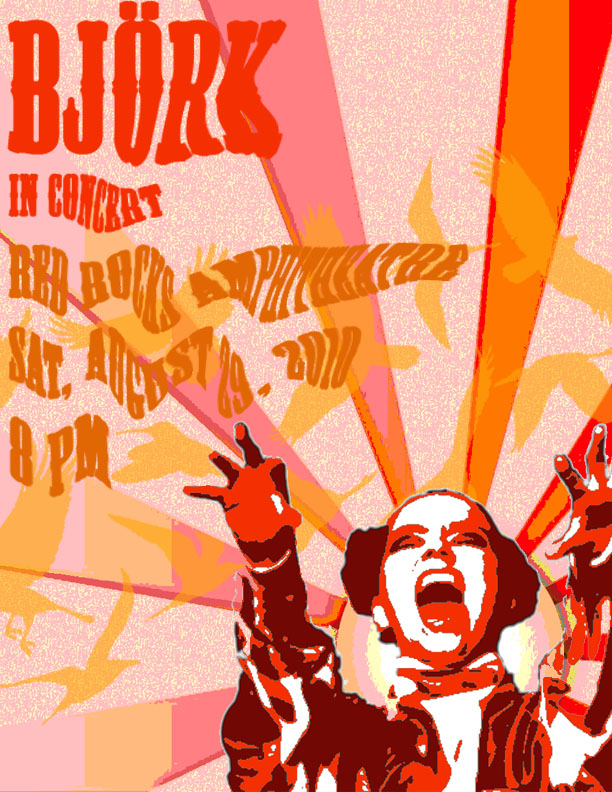
Concert Posters are works of art. Check out examples on Google Images. You will create a poster for a band or artist advertising the event of a concert.
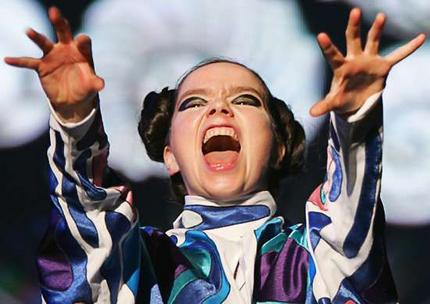
1. Pick your artist/band. Find a good, dramatic photo of them and make sure its not too small. Open it up in Photoshop and get rid of the background. Make it black and white under Image–>Adjust–>Desaturate. Blur it a little under Filter–>Blur–>Gaussian Blur. Posterize it under Image–>Adjust–>Posterize (3-4 Levels). SAVE!
From this To this

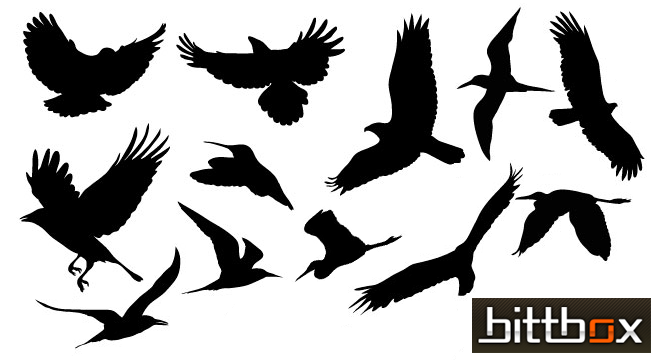
2. Find two large vector graphics to combine to make your background. Vector graphics is the use of geometrical primitives such as points, lines, curves, and shapes or polygon(s), which are all based on mathematical equations, to represent images in computer graphics. Look at these links: vector wallpaper, vector backgrounds, geometric design, free vectors, vector ray or find your own. I chose to use these two:

3. Open a new document in Photoshop that is 8 1/2 inches wide by 11 inches tall. Paste one of your vector backgrounds into this document and rotate, move it until you like the composition. If your background has a lot of detail, posterize it under Image–>Adjust–>Posterize (3-4 Levels). If you don’t like the colors, change them under Image–>Adjust–>Hue/Saturation.
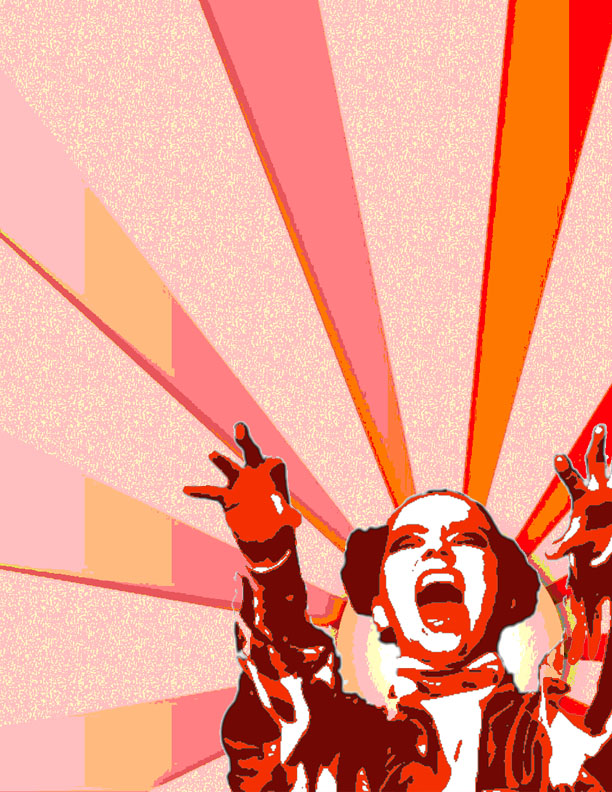
My 8 1/2 x 11″ posterized vector background

4. Paste the image of your artist/band onto your background. You need a color scheme to tie the poster together. I chose to make my poster in all warm shades like red, orange and yellow. Click Select–>Color Range and then click on a black part of your artist/band. Choose a dark color in your color scheme and then click Edit–>Fill–>Foreground Color. The black should now be the new color. Repeat this step with the shades of grey in your artist/band. Your artist/band should now match your background.
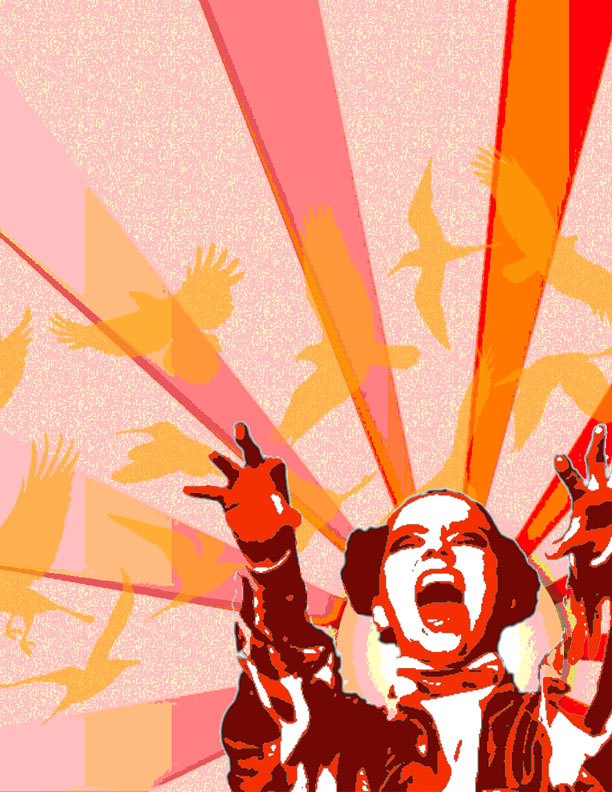
5. Paste your second vector image into the document. Make it the middle layer. Posterize it, and change the colors to match the color scheme. Adjust the opacity level so that you can see through it to the back layer.
6. Now you need to create the text for your poster. The poster should include the name of the artist/group, the venue (place) they are playing at, the date and time and if you choose, the opening band. Pick a cool font and colors to match your color scheme. Next, distort your text in some way. First – Photoshop 5.5: Render the type layers under Layer–> Type–> Render. Photoshop 6.0 Rasterize the type layers by right clicking on it and selecting Rasterize. Now you can change the text in different ways. You could click Edit–>Transform–>Skew, Distort, or Perspective. Another option is to click Filter–>Distort and try out the different options. Make sure your text is somewhat legible!
7. Phew! Once you are finished, flatten image and save as a jpeg. Post your poster to your blog. What new did you learn how to do on photoshop with this assignment? What do you think of your product?